Mudbox alien head
This week we has to try create an alien using mudbox.


Next we turned on mirror mode which meant that whatever was done on one side was exactly done on the other, here you can change to the x y or z axis depending on where you want to work.


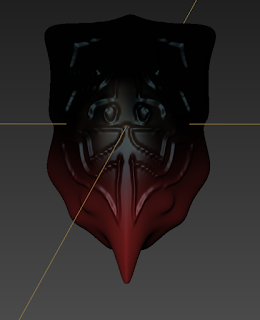
Level 6: For level six the detail in the head was more polished and clean and the front features were very bold and beginning to make themselves more apparent.


Level 7: For level seven the detail on the head becomes even more bold especially near the beak, the detail on the side of the head is way more noticeable.


Color: For the color I made two layers, one for the base model which I made red and black, and then the other layer I painted the eyes black and the markings on the head red and green.


Notes and final summary: I made the detail on the head using a stencil tool and creating it onto a new layer then I made the layer more opaque to the texture wasn't as solid and less detailed, next time I would do the head crest color and the sculpt for the details at the same time so it would be perfect.
Our first step was to create a cube on Maya and then export it to an obj file
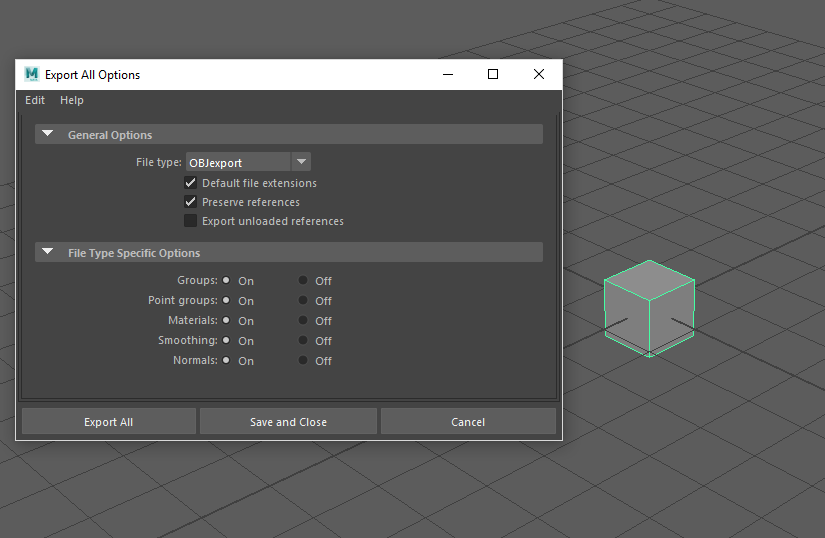
This gives us a different type of cube than the mudbox one. The one on mudbox can be pulled and played with because it has much higher polygons compared to the Maya one which only has a few that can be moved.

< Maya cube

< Mudbox cube


Here you can see that this example I made is symmetrical from the x axis.
What we did firstly was pull the Maya cube into a shape using the grab tool and as it only has a few polygons it moved quite drastically. This is called level 0 where it is at the lowest polygons possible.

< level 0 (front view)

< level 0 (side view)
By pressing shift + d I could create a new a new subdivision level where it increases the polygon count. We edited on a layer and then when we were done we pressed the PgUp key to move to a higher layer or PgDn to move back down one, this could be done at anytime.
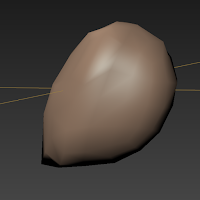
Level 1: here is level one where mudbox turned the cube into more of a sphere but with my grab tool on the last level it is warped to look more like an egg or oval shape.


< level 1 (front view)
< stage 1 (side view)
Level 2: For level two the oval got more rounded and I decided to add more of a crest like on the front view by grabbing the corners using the mirror tool too.

< level 2 (front view)

< level 2 (front view)
Level 3: For level three I decided to add a beak like feature at the front by grabbing and pulling down, here I also added more detail to the top of the head.

< level 3 (front view)

< level 3 (front view)
Level 4: Here for level four I added more detail to the head and slowly added parts of eyes and more detail near the head

< level 4 (front view)

< level 4 (front view)
Level 5: For level five there was much more detail for the head and around the eyes and the beak more detail, I started adding in lines on the head for more detail.

< level 5 (front view)

< level 5 (front view)

< level 6 (front view)

< level 6 (front view)

< level 7 (front view)

< level 7 (front view)
Level 8: For level eight there is a little more detail on each part and that is where I ended modeling.

< level 8 (front view)

< level 8 (front view)
Color: For the color I made two layers, one for the base model which I made red and black, and then the other layer I painted the eyes black and the markings on the head red and green.


Comments
Post a Comment